Chapter 11: Building and Distributing
Building and Distributing
Designing your installation is only half the battle. Once you have something tangible to work with, you must build and eventually distribute your installer. Luckily, Setup Factory makes this process as seamless as the actual installer design process.
From choosing your distribution media to fully unattended build options, Setup Factory makes building your project a pleasure, not a chore.
In this chapter, you'll learn about:
• The build process
• The publish wizard
• Build configurations
• Constants
• Pre- and post-build steps
• Build-related preferences
• Testing and distributing your installer
Once you have finished creating your Setup Factory project, you must build it into the actual setup file (or files, if you're building a multi-part installer). This is similar to a programmer compiling code once the code is complete.
When you choose to build your project, Setup Factory will first verify all files and folders that you have included. It will then convert any serial number lists you have into MD5 hash lists and encrypt them. It collects any fonts you have opted to install and converts any graphics into the setup file. Once the images have been converted, the language modules are processed, all the contained files are compressed, the configuration file is created, and the compressed setup is built.
With the goal of making the build process as seamless as possible, Setup Factory includes a Publish Wizard to assist you.
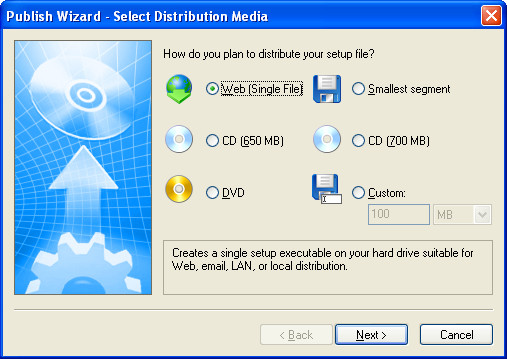
The first screen of the Publish Wizard allows you to specify which type of media you will be distributing your installation on. By identifying this, you are essentially telling Setup Factory what the maximum size of any one created file should be. For example, if your setup is 1.15 gigs and you are distributing on 700mb CDs, Setup Factory will split your installation into two files, ready to be burned.
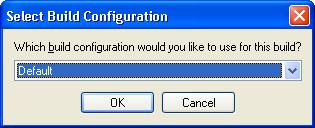
Note: If your setup project contains more than one build configuration, the wizard will prompt you to choose which build configuration you want to use before it starts:
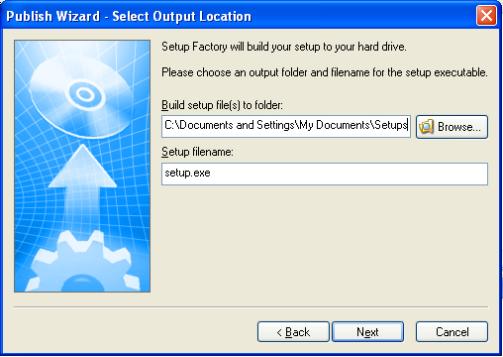
The second screen of the Publish Wizard prompts you for the location that you would like to publish to, as well as the name of the file that you would like to create.
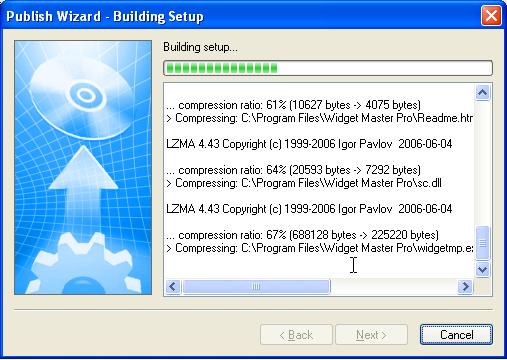
Once the Next button is clicked on the above screen, Setup Factory begins to build the setup.
Tip: You can configure Setup Factory to hide the output process during the build to decrease the build time. You can do this by disabling the "Report status during build" preference found in the Build section of Edit > Preferences.
Once the build process is complete, the following summary screen is displayed. This screen presents a summary of the build process and displays any errors. Once you are finished viewing this screen, you can simply click Finish. If the Open output folder option is checked, the output folder will be opened automatically when you click Finish.
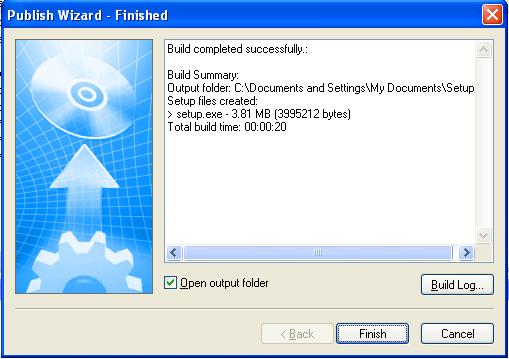
Tip: If you need more information or want to trace an error, you can view the entire build log file by clicking the Build Log button.
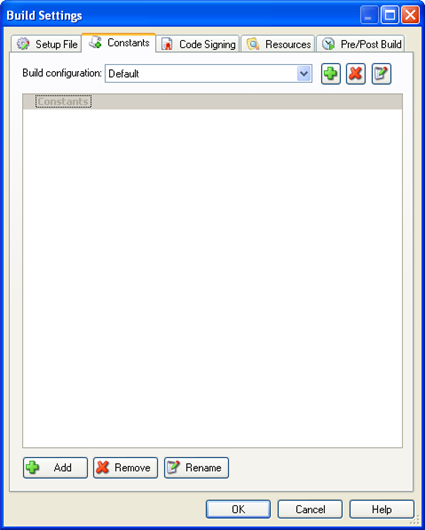
The Build Settings dialog, accessible by choosing Settings from the Publish menu, allows you to set the defaults you would like to use for the build process. Basically, any setting affecting the final built file is found here.
When working with an installer that can be built into one file, changing the setup filename simply changes the name of the built file. However, when working with an installer that will be split into two or more segments, changing the setup filename also changes the names of each of the segment files.
The segment size setting allows you to specify the maximum file size that any installation file will have. If your complete setup is larger than the size specified, the final installation will be split into two or more files. This is especially useful if you are distributing your installation on fixed-size media such as CDs or DVDs.
Tip: Setup Factory has pre-specified segment sizes to make distributing your installations on standard media such as 650mb and 700mb CDs, DVDs a breeze.
The compression settings provide some flexibility in how much, and the type of compression that is used when generating your setup. These settings can be used to control the size of the generated file, speed of the build process, as well as runtime decompression performance.
The platform setting controls the desired platform of your generated setup. Setup Factory can generate either 32-bit or 64-bit setups which makes it possible to distribute both 32-bit and 64-bit compiled applications/files.
Note: If your setup includes dependency modules, plugins, or any other resources, you must also ensure you have selected the correct platform version of those resources.
Tip: If you plan to distribute both 32-bit and 64-bit setup files for your application, it may be possible to create a single setup project for both platforms instead of separate project files. For minor differences between platform distributions, it may be beneficial to create build configurations containing the differing settings for each platform in order to maintain a single setup project file.
To start, create a build configuration containing all the settings required for one of the platforms, making note of any settings not controlled directly by build configurations that may need to be different. Such settings may require the creation of build constants in order for the information to be dynamically set at build time.
Once you've defined all of the settings for your first configuration, you can add a new one by copying all of the settings from your initial one and then modify it accordingly. Build configurations are discussed in the next section.
One of the many timesaving features of Setup Factory is the ability to use build configurations within your setup project. When working with two similar installs, such as a Standard and Professional version of your software product, it is often easier to create one setup project and have only the required files and serial number lists for each respective installer included at build time. Or, you may have an application you are distributing on both 32-bit and 64-bit platforms where the differences in settings are minimal (see the Platform setting on the Setup File tab of Build Settings).
Build configurations can be added to the current project
by clicking the Add button (  ) near the top of
the Build Settings dialog. Once a build configuration is added, you can
assign files, folders, and serial numbers to it from the main design window.
) near the top of
the Build Settings dialog. Once a build configuration is added, you can
assign files, folders, and serial numbers to it from the main design window.
Files and folders can be associated with specific build configurations from their respective properties dialog, or they can be associated with 'All' build configurations. Serial numbers can be included as well with only specific build configurations by assigning the list to a build configuration in the Serial Numbers List Properties dialog. Other areas that are part of build configurations include Dependencies, Primer Files, Script Files and Plugins, all of which are available under the Resources menu item.
Constants are essentially design time variables. They are similar to session variables, but instead of being expanded as the user runs the installer, they are expanded when you build the project. In other words, when you build your project, all of the constants are automatically replaced by the values assigned to them.
You can define constants on the Constants tab of the Build Settings dialog, which you can access by choosing Publish > Settings.
Clicking the Add button displays a dialog where you can name the constant and give it a value.
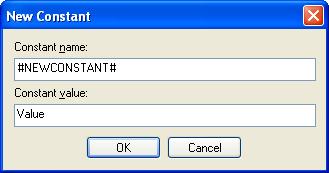
By default, each constant has a name that begins and ends with a # sign (but they don't have to), and an associated value. The name will be replaced by this value throughout the project when the project is built. It's exactly like a big search-and-replace operation that happens whenever you build the project.
Since each constant is essentially just a name that gets replaced with different text, you can use them just about anywhere. You can use them on screens, in file paths, in actions…pretty much anywhere that you can enter text.
Note: If constants are used in script, they must be in a different format, such as _DEBUG_ to eliminate any syntax errors.
The values that you assign to constants are specific to each build configuration. In fact, this is what makes constants so useful. By assigning different values to the constants in each build configuration, you can make sweeping changes to your project by simply selecting a different build configuration when you build it.
Note: The build configuration determines which values are used when the project is built.
Here are some things you can do with constants and build configurations:
• use constants in the paths for your source files, and use different versions of the files for different build configurations
• use constants for the name of the product, so you can switch between building a full version and an evaluation version just by changing the build configuration
• use actions that test the value of a constant named #DEBUG#, and set it to true in a "Debug" build configuration and false in all other configurations. Then you can leave helpful debugging code in your scripts, and only have it performed when you build the Debug configuration. For example:
function MyFunc()
nCount = nCount + 1;
if _DEBUG_ then
Debug.ShowWindow();
Debug.Print("Inside MyFunc()
- nCount = " .. nCount);
end
end
Constants are extremely useful for performing unattended builds because they can be changed using a command line argument. You can even use constants to specify the output location, and which build configuration to use. The possibilities are endless.
For example, you could create a batch file that would generate a unique installer for every one of your customers, with the customer's name showing up on one or all of the screens during the installation.
For more information on performing unattended builds of your project, search for "Unattended Build Options" in the program reference.
There may be instances where you want to run a program either before or after your installer is built. Setup Factory makes this process easy through Pre and Post Build Steps. On the Pre/Post Build tab of the Build Settings dialog, you can set a program to Run Before Build, and a program to Run After Build.
The uses of this feature are limited only by your imagination. You could, for example, chain several product build processes together, or execute a preliminary batch step. The possibilities are limitless.
You can specify the path to the desired program in either of the Run Program fields. Any command line arguments that are needed should be specified in the Command Line arguments fields. If you want Setup Factory to 'sleep' while the other program is open, check the Wait for program to finish running checkbox.
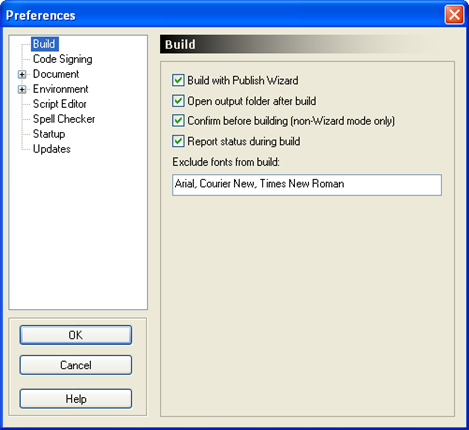
To control how Setup Factory handles the build process, you can modify the Build Preferences by choosing Preferences from the Edit menu. You can control whether Setup Factory opens the output folder by default, disable the publish wizard, disable the output status and, when not using the wizard, control whether a confirmation dialog is displayed before the build process begins.
Typical build preferences can be seen here:
One of the most important and often overlooked steps when creating an installer is testing it after it has been built. You should test your installer on as many computers, operating systems, and platforms as possible. Try it on every operating system and platform that your software product supports. Windows XP, Windows Vista, Windows 7, Windows 8, Windows 8.1 and Windows 10 all have both slight and major differences between them, and should be thoroughly tested. As well, test your installer on various OS configurations with different resolutions, color depth and font sizes, and on systems with a lot of hard-drive space and on those with a very limited amount of hard drive space.
If you have made use of Setup Factory's multilingual support, be sure to test out each language in your install. If you included any dependency modules, test your installer on a virgin system to ensure that the dependency files install correctly.
Many problems with installers have simple causes, such as forgetting to include a file, or moving a file to an incorrect location. Compatibility issues can crop up when your software is not written for a particular operating system, or when the dependency files that are included in the installer do not function on a particular operating system.
If you do run into a problem with your installer, test it on as many systems as possible to narrow down the problem. You might discover a common factor between the systems that is causing the installer (or your software) to fail.
It is very important to test before you distribute. An 'internal build' of your installer is much easier to recall should a crippling problem arise than a public release is.
Tip: For information related to tracking down script-related issues, see Debugging Your Scripts in the Scripting Guide.
Once you have thoroughly tested your installer, it is time to distribute your software. After all, a beautifully created setup is an awful waste if your customers and clients cannot enjoy it! There are several ways to distribute your software, but the three main media are CD-ROMs, DVDs, and the Internet. Setup Factory allows you to specify a segment size to effectively split your installer into smaller sized files. This is ideal for distributing an installer that is larger than the target media.
Preparing your installer for distribution is as easy as selecting your desired media type in the publish wizard, and publishing to a hard drive folder. Once the build operation has completed, simply copy each segment file (or just the setup executable if there is only one file) onto separate discs, and you are ready to go! Or, if you have opted to distribute via the Internet, simply take the generated setup file and upload it onto your website for your customers to download.