Chapter 1: Getting Started
Every journey begins with a first step. In this chapter, we'll walk you through the creation of a new project and introduce you to the Setup Factory program interface.
In this chapter, you'll learn about:
• Starting a new project
• Making sure you have the latest version
• Learning the interface
• Getting help
• Setting preferences
• Planning your installation
Everything has to start somewhere. In Setup Factory, the design process starts with the creation of a new project.
A project is simply the collection of files and settings and everything else that goes into building an installer. A typical project will contain all of the files that you want to distribute, some screens that inform or gather information from the user, and maybe a few actions to take care of any extras (such as storing the installation path in a registry key for future use by your patching tools).
When you start a new project, Setup Factory's project wizard walks you through the first few steps of project creation. This helps you get your project started quickly without missing any of the basics.
Lets open the Setup Factory program and start a new project.
Use the Start menu to launch the Setup Factory program.
You'll find Setup Factory under:
Start > Programs > Indigo Rose Corporation > Setup Factory 9
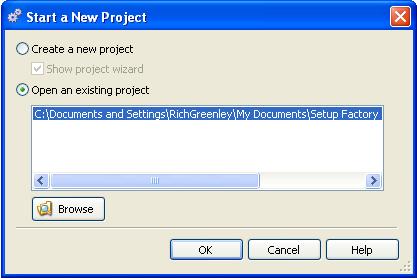
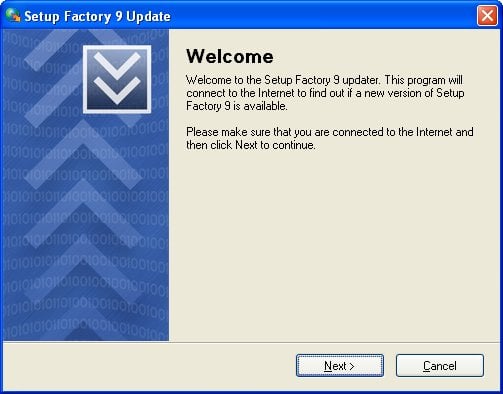
The Welcome dialog appears whenever you run Setup Factory. It not only welcomes you to the program; it also lets you easily create a new project or open an existing one
When you click on Create a new project, the Welcome dialog closes and the project wizard appears.
The first step of the project wizard asks you for four pieces of information related to your project. Simply enter your company name, product name, product version, and web address into the appropriate fields.

When you've entered all your information, click Next to move to the next step in the project wizard.
Tip: At any step in the project wizard, you can click Cancel to go straight to the program window with no files added and all of the default settings untouched. If you find that you don't use the project wizard, and want something a little more permanent than clicking Cancel, you can uncheck the Show Project Wizard checkbox in the Start a New Project dialog. Turning off that option will make Setup Factory open a blank project all the time, without showing you the project wizard. For now though, leave this option turned on so you can see what the project wizard contains.
The next step in the project wizard is to specify the desired platform
of your setup. This decision should be made based on the platform (either
32-bit or 64-bit) of the application or files you are distributing. This
setting can be changed at any time in the build settings.
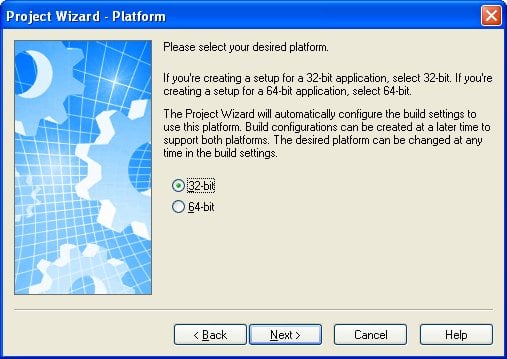
When you've made a selection, click Next to move to the next step in the project wizard.
The next step in the project wizard is to specify the folder where your source files are located.
Note: In this case, source files refers to the original files on your local hard drive, i.e. the files that you want to create an installer for, and not files containing source code. Setup Factory doesn't need access to your source code files at all (unless you intend to distribute them in your installer).

Tip: You can use the Browse button to browse for a folder.
If your product files are spread across several folders, choose the main folder that represents the core of your product. By default, all of the files and folders contained within the folder that you select will be included as well, so you want to choose the folder at the top of your product's folder hierarchy.
Once you've selected the folder, click Next to proceed to the next step.
This step determines whether or not your installer will have a background window behind it covering the users desktop.
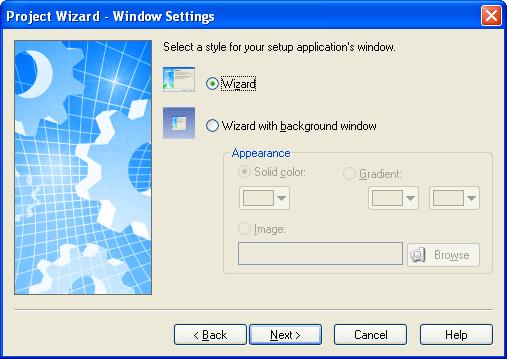
Note: If you choose to have a background window, you can customize its appearance using the settings in this project wizard step.
Once you've selected your window style, click Next to proceed to the next step.
Setup Factory has support for project themes. Project themes are a set of visual attributes that are applied to all of the screens in your installer to give them a uniform look and feel. These attributes include color, banner styles, images, fonts, and more. You can change the look throughout your entire installer by simply switching to a different theme.
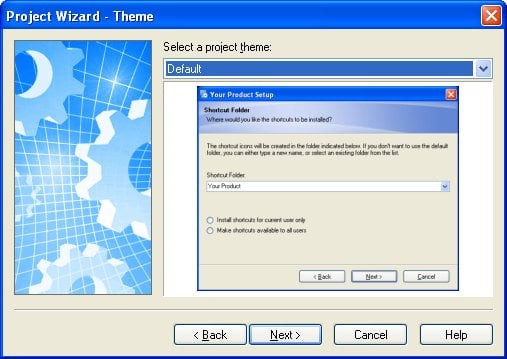
Below the theme selector, a preview image shows what a sample screen would look like with the theme applied.
Note: The selected theme will be applied to all screens in your project. However, you can override the theme settings on a per-screen basis using the Override project theme option on each screens Style tab.
Feel free to try out some of the different themes. Once you've picked one that you like, click Next to proceed to the next step in the project wizard.
The Multilingual Settings step of the project wizard asks you to select the languages that you want your installer to support. Every language in the list that has a checkmark next to it will be supported in your setup.
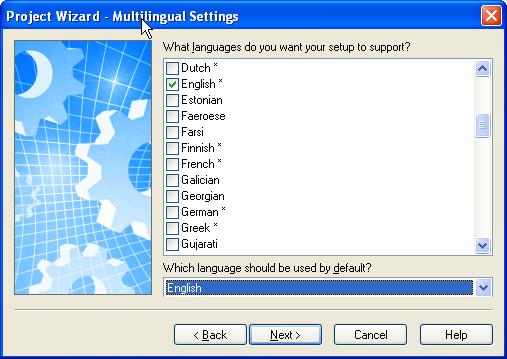
Two things happen when a language is supported. First, Setup Factory will use the text from that language's message file (if one exists) for the installers built-in messages when that language is detected at run time. (If a message file doesn't exist for a particular message, the default languages message file will be used.)
Second (and more important), you will be able to localize the text in your project for each supported language. For example, if you choose English, French and German as your three supported languages, you will be able to enter different English, French and German text on your projects screens, package descriptions, etc. This is done by simply choosing a different language from the language selector that appears wherever there is text that you can translate in your project.
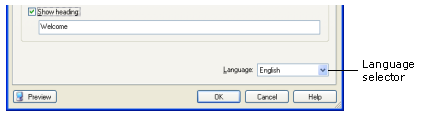
Note: Supporting a language adds it to the list of languages available in the language selector.
Once you've selected the languages you want to support, click Next to proceed to the next step.
If your product has any requirements, such as the Visual Basic or .NET runtime, select them in the list. Setup Factory will automatically check for the selected technologies at run time and will require the user to install them before performing the installation.
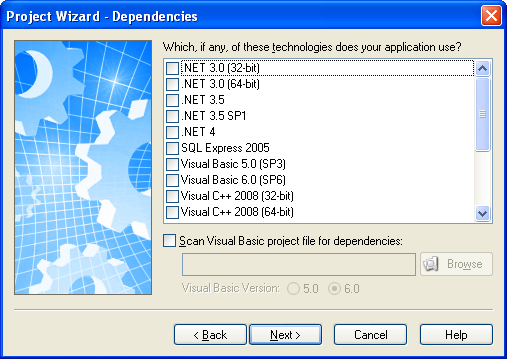
Select your product's requirements in the list, and click Next to proceed to the final step.
The final step of the project wizard lets you configure a number of optional features, such as whether to automatically provide an uninstaller, and whether to alert the user if they attempt to install without Administrative privileges. (Usually you'll want to leave all of these features turned on.)
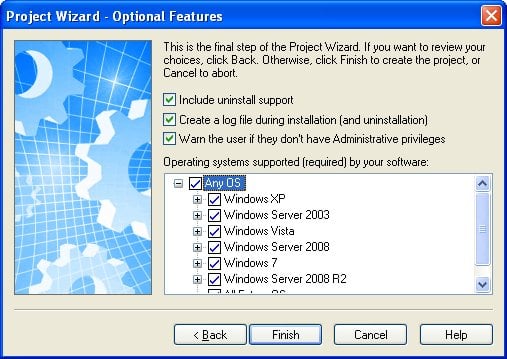
You can also configure the operating system requirements for your project. Setup Factory will automatically limit the installer to only perform the installation on operating systems that are selected (checked) in this list. So, for example, if you do not want anyone to install your software on Windows XP, simply turn off support for that operating system, and the installer will automatically abort (with a short explanation) when its run on that OS.
When you click Finish, the project wizard closes and the new project is loaded into the design environment with the settings you chose.
Note: The Setup Factory program interface is also known as the design environment.
If you selected a folder with files in it in step 5, those files will automatically be added to the file list for you.
At this point, you could build the project and generate a basic installer for those files. Of course, you'd probably want to customize the screens before distributing it. To learn how to customize the screens in your installer, see Chapter 3.
Tip: Once you're in the design environment, you can start a new project by choosing File > New.
The easiest way to work with Setup Factory is with the program window maximized so it covers the whole screen. This way, you have the whole desktop area to work with, and you wont have any other programs or windows in the background to distract you.
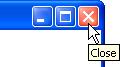
To maximize the window, click on the little Maximize button, which is the second button from the right on the Setup Factory title bar (right next to the Close button).
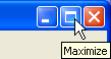
If the maximize button looks like this:
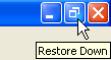
...it means you already have the program window maximized. (That button is actually the Restore button, which takes the place of the Maximize button while the window is maximized. If you click the Restore button, the window will return to the size and position it had before you maximized it.)
As with any application, Setup Factory will from time to time be updated to include bug fixes and possibly new features. In order to ensure you have the most current version of Setup Factory installed, you can check for updates by choosing Help > Check for Update from the program menu.
Note: Setup Factory will automatically prompt you to check for updates every 30 days by default. You can modify this value at any time through the Preferences dialog (Edit > Preferences)
Tip: To include this type of functionality in your software application, check out TrueUpdate (www.indigorose.com) today!
Now that you have Setup Factory started and you've made sure that you're using the latest version, its time to get comfortable with the program interface itself.
The Setup Factory program window is divided into a number of different parts.
At the top of the window, just under the title bar, is the program menu. You can click on this program menu to access various commands, settings and tools.
Below the program menu are a number of toolbars. The buttons on these toolbars give you easy access to many of the commands that are available in the program menu.
Tip: You can create your own custom toolbars or edit the existing ones by choosing Tools > Customize.
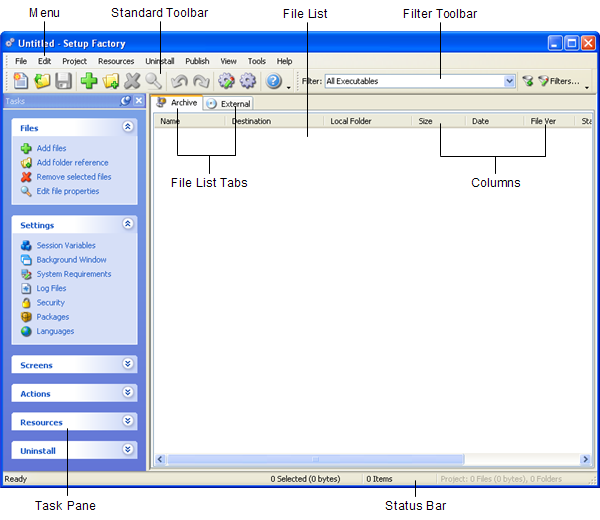
Most of the program window is taken up by the file list, which is where all the files in your project are listed. There are actually two file lists - one for files that are packed into the setup executables data archive, and one for external files that are distributed along with your setup executable. You can switch between the Archive file list and the External file list by clicking on their respective tabs.
At the very bottom of the window, a status bar reflects your interaction with the program and offers a number of informative readouts.
The rest of the program window is made up of individual sub-windows known as panes. Each pane can be docked, tabbed, pinned, resized, dragged, and even made to float on top of the design environment.
The long horizontal pane near the bottom of the program window (just above the status bar) is the output pane (which isn't visible by default). This is where Setup Factory displays the progress of lengthy operations, such as report generation, project conversion, and building the project (unless the publish wizard is being used, since it has its own output window).
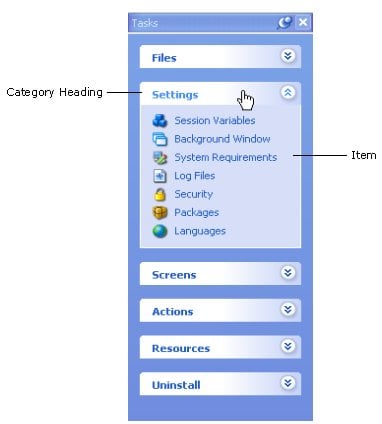
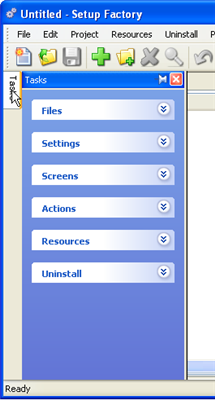
The tall pane on the left is the task pane. The task pane provides easy access to the parts of Setup Factory you will use the most. It provides an alternative to the program menu for accessing the various parts of the Setup Factory design environment.
The items on the task pane are organized into categories. You can expand or collapse these categories by clicking on the category heading.
You can close a pane by clicking on the little x on its title bar.
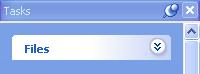
All of the panes can be toggled on or off in the View menu. When you choose View > Tasks, the task pane is restored to the same position it occupied before you closed it.
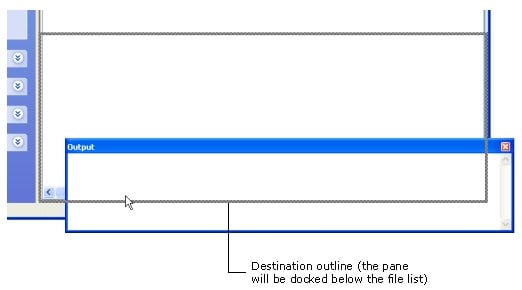
First, make the output pane visible by choosing View > Output. You can resize panes by dragging their edges. In this case, you want to drag the part between the output pane and the file list...specifically, the little bit of window surface below the file list and above the output panes title bar. As you begin to drag the edge of a pane, a line will appear to show where the edge will move to when you release the mouse button.
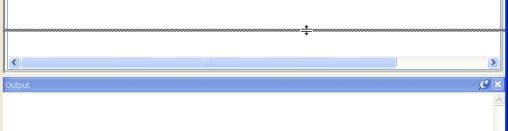
When panes are docked alongside each other, dragging an edge will resize both panes at the same time. As you make the output pane taller, you will be making the file list shorter at the same time.
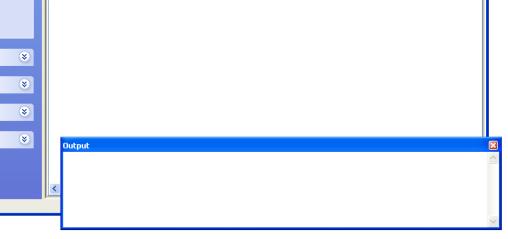
The output pane is docked by default. A docked pane is seamlessly integrated into the program window. You can un-dock it from the program window by double-clicking on its title bar.
When you un-dock the output pane, it floats above the program window, and the file list expands to fill in the space that the output pane left behind.
You can move panes around by dragging them by their title bars. As you move a pane, an outline shows you the general area where the panel will end up. If you drag the pane near the edge of the program window, or near another pane, the outline will snap to show you how the pane can be docked, tabbed, or otherwise combined with the target area.
Tip: When you're dragging panes, its the position of the mouse cursor that determines where the outline snaps into place. For example, to dock a pane below another one, drag the pane so the cursor is near the bottom edge of that pane. To tab one pane with another, drag the pane so the cursor is on top of the other panes title bar.
Docked panes can also be pinned or unpinned. Pinned panes remain open when you're not using them. (All of the panes in the default layout are pinned.) Unpinned panes stay out of the way until you click on them or hover the mouse over them. Whenever you need them they slide open, on top of everything else, and then slide closed when you're done.

The
task pane unpinned...
...and
after "sliding" open
You can pin or unpin a pane by clicking the little pin icon on the panes title bar.

Panes remember their positions even after you unpin them. If you unpin a pane, and then pin it again, it will return to the position it had before it was unpinned.
If you still have questions after reading the users guide, there are many self-help resources at your disposal.
Here are some tips on how to quickly access these self-help resources.
The online help is only a key press away! Setup Factory comes with an extensive online program reference with information on every object, action, and feature in the program.
In fact, whenever possible, pressing F1 will actually bring you directly to the appropriate topic in the online help. This context-sensitive help is an excellent way to answer any questions you may have about a specific dialog or object.
Note: You can also access the online help system by choosing Help > Setup Factory Help.
There are three ways to navigate the online help system: you can find the appropriate topic using the table of contents, or with the help of the keyword index, or by searching through the entire help system for a specific word or phrase.
To exit from the online help, just click the Close button on the help windows title bar.
Setup Factory is used by thousands of people worldwide. Many users enjoy sharing ideas and tips with other users. The online forums can be an excellent resource when you need help with a project or run into a problem that other users may have encountered.
Choosing Help > User Forums opens your default web browser directly to the online user forums at the Indigo Rose web site.
Exit from your web browser and switch back to the Setup Factory program.
Alternatively, you can press Alt+Tab to switch back to Setup Factory while leaving the web browser open in the background.
This takes you to the Indigo Rose web site, where a variety of online technical support resources are available to you.
This is also where you can find information about ordering one of our premium support packages and submitting a support request.
When you're done browsing the technical support information, return to the Setup Factory design environment to continue with this chapter.
There are a number of preferences that you can configure to adjust the Setup Factory design environment to suit your work style. Lets have a look at some of them.
This will open the Preferences dialog, where all of Setup Factory's preferences can be found.

The preferences are arranged into categories. The categories are listed on the left side of the dialog. When you click on a category, the corresponding preferences appear on the right side of the dialog.
The Document preferences allow you to change settings that affect the project file. For example, you can configure the auto-save feature that can automatically save your project file as you're working on it to avoid any accidental loss of data. You can also configure the number of undo/redo levels, and choose either to use the project wizard to create new projects or to simply start with a new, blank project.
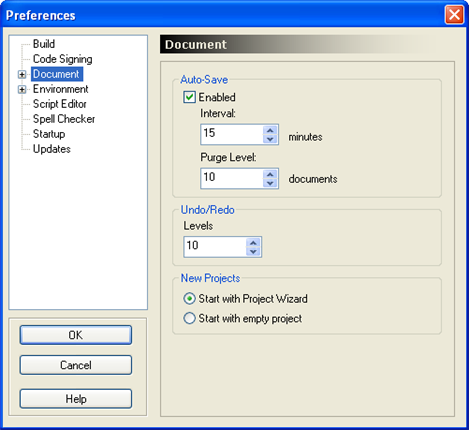
Tip: It can be helpful to set the number of undo levels to a larger value, like 25 or 50. That way you can undo even more steps back if you change your mind while you're working on a project.
You can also expand the Environment category by clicking on the little plus symbol to the left of it.
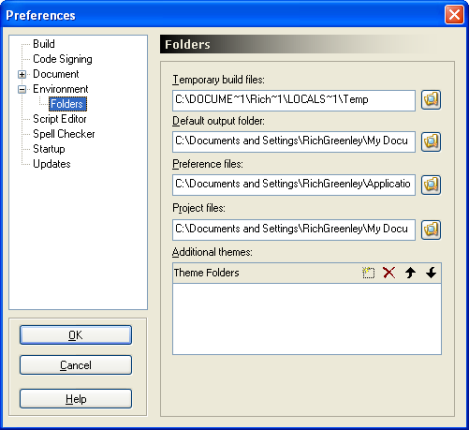
The Folders category allows you to specify the locations of various folders that are used by the project. For example, you can specify the location of the project folder (where project files are stored) and the default output folder (where setup executables are built to by default).
There are many other preferences that you can set, such as what to do when the design environment is started (in the Startup category) and what happens when you add files to the project (in the Document > Files category). Take some time to look through the categories and familiarize yourself with the different options that are available.
Remember that you can click Help or press F1 to get more information about any of the settings in a specific category.
The first step in creating a successful software installation is to plan it out.
In fact, planning your installation is one of the most important steps in designing a professional installer. Knowing what your installer needs to accomplish in advance will give you a clear goal to aim for and a solid plan to follow.
Tip: As with most things, the more planning you do now, the less repairing you'll have to do later. Investing some time in planning at the start can save you a lot of time in the long run.
There are several things you need to know in order to create an installer:
What files do you need to distribute?
Where do your files need to be installed?
What system changes need to be made?
What information do you need from the user?
This section will provide you with the information you need to answer these questions as quickly and accurately as possible.
The first step in preparing your installation is to determine exactly what files your software requires for proper operation.
There are four basic types of files that you may need to distribute: program files, configuration files, operating system components, and shared application resources.
Program Files
Program files are the main files of your application. These files are essential to your application and are only useful in the context of your application. They can be executables, help files, documents, templates, or any other data files that your application requires. Program files usually make up the bulk of your software.
Configuration Files
Configuration files are used to store startup options, user settings, and other configuration options for your software. Information can be read from and written to these files during the normal operation of your application. These files are often referred to as config files, and come in many different formats, from traditional INI files (which adopt the same internal structure as Windows .ini files) to modern XML files.
Operating System Components
These files are usually included with the Windows operating system, but you may want to distribute the newest versions of certain files, or you may have developed custom system files of your own. These files are generally DLLs, OCX components, or hardware drivers like SYS files and VxDs.
Shared Application Resources
These are files that may be shared by more than one application, such as ActiveX controls, OCX components, and DLL files.
Some of the files that you need to distribute will be obvious, such as the main executable and help files. Others may be less apparent, such as DLLs and ActiveX controls installed in the Windows directories of your development system.
Note: Many of todays development tools require that you distribute runtime support files along with your application. Please consult your development tools documentation to determine what files you need to distribute with your software.
Often an executable in your application absolutely requires other files in order to work properly. These absolutely required files are known as dependency files.
Dependency Files
Dependency files are external support files that an executable requires for proper operation. In other words, they are external files that a program file depends on in order to function properly. Dependency files may include INI files, DLLs, ActiveX controls, OCX components, or any other support file type. Although its generally preferable to install dependency files in the same folder as the program that needs them, they are often installed in other locations, such as the Windows system directories.
Tip: Setup Factory has a built-in dependency scanner that you can use to identify dependency files and add them to your project. You can access this feature by choosing Tools > Scan File Dependencies.
The ultimate goal of a good installer is to get your software onto the users system in an easy and accurate manner. Although Setup Factory ensures both you and your users ease of use, the accuracy of the installation itself is largely up to you. Whether your files are installed in a structure in which they can function properly depends largely on where you tell Setup Factory to install those files.
The best way to ensure an accurate installation is to prepare the software in its finished state on your development system before you begin creating the installer. This means setting up the entire directory structure and all of the file locations exactly as you want them to appear on the users system.
The end result should be that your software is fully installed on your development system exactly as you want it installed on the users system.
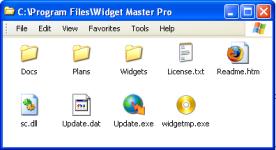
Not only does this make it easy to test your software in its intended directory structure, but it also makes the process of designing the installer much quicker and easier for you. All you'll have to do is drag your application folder onto the Setup Factory project window, and the files and sub-folders will be recreated exactly the same on the users system. Below you'll find an example of a well-prepared directory structure.
Tip: You should fully test your software in its final structure before creating the installer.
Once you have your software organized, you need to determine exactly where each file needs to go on the users system. Although Setup Factory does a lot of this work for you by maintaining directory structures when you add files to your project, there are still some files that may need to be directed to different locations on the users system.
Here are some guidelines to help you determine where you should install your files on the users system. Once again, there are four basic types of files that you may need to distribute: program files, configuration files, operating system components, and shared application resources.
Program files should be installed in a folder that the user chooses during the installation process. Throughout this manual and in the Setup Factory program, this folder is referred to as the application folder. The path to the application folder is represented by the built-in session variable %AppFolder%.
Tip: For more information on session variables, see Chapter 5.
Its okay to install program files in sub-folders within the application folder-in fact, organizing your program files into sub-folders is a very good idea. Your files don't all have to be in the application folder itself; the folder that the user chooses can be used as a common application folder, with sub-folders for all of your program files.
If the users aren't given an opportunity to choose an installation folder, the path that you provided as the default value for %AppFolder% will be used. You can provide a default path for the application folder on the Session Variables tab of the Project Settings dialog. (To access this tab, choose Project > Session Variables from the menu.)
In the past, initialization or INI files were often installed in the Windows folder (%WindowsFolder%). This is definitely not necessary or even beneficial in all cases. Unless your application shares a configuration file with other programs, its best to install the file in the application folder along with your program files.
You should avoid installing any files in the Windows folder, or in any other folders where critical operating system files are stored, unless it is absolutely required by your application.
Operating system components, such as DLL or OCX files, are traditionally installed in the WINDOWS\SYSTEM folder (%SystemFolder%). If your application doesn't need to share these files with other applications, its best to install them in your application folder (%AppFolder%) instead.
Shared application resources, such as some ActiveX controls or DLL files, are generally installed in the WINDOWS\SYSTEM folder (%SystemFolder%).
Note: Many DLL and OCX files are COM servers, also known as OLE components and ActiveX controls. As such, they will need to be registered with the operating system before they will be available for use by your application.
Setup Factory will automatically try to detect files that require registration when you add them to your project. You can also manually indicate files that you want Setup Factory to register by using the options on the Advanced tab of the File Properties dialog. Or you can use an action like System.RegisterActiveX to register a file manually at run time.
Keep in mind that some DLL and OCX files have dependency files themselves, and these dependency files need to be distributed and possibly also registered before the DLL or OCX files can be used. You should consult the documentation for your components to determine what dependencies they have.
Note: Many OCX and DLL controls ship with a dependency file. The dependency file typically has the same filename as the control with a .DEP extension, e.g., Control.ocx would have a dependency file named Control.dep. These dependency files can be opened and viewed with a text editor (such as Notepad) and can tell you a lot about what, if any, dependencies the control may have.
Tip: You can also use Setup Factory's built-in dependency scanner to identify any dependency files your components may have. You can access the dependency scanner by choosing Tools > Scan File Dependencies.
The next step is to think about what changes, if any, need to be made to the users system. This can include changes to system files (such as WIN.INI, CONFIG.SYS, SYSTEM.INI and AUTOEXEC.BAT), changes to the Registry, and even such things as installing and registering fonts. All of these changes can be handled easily using Setup Factory actions.
For more information on actions, see Chapter 4.
The final step in planning your software installation is to consider what information you will need from the user, and what information you will need from the users system. For example, in order to personalize your software or register it to a specific user, you may want to ask the user to provide their name on a User Information screen. Or, you may want to ask the user for a serial number on a Verify Serial Number screen.
For more information on screens, see Chapter 3.
Tip: You can also use actions to prompt the user for information (e.g. Dialog.Input) and to gather other information directly from the users system (e.g. System.GetUserInfo). See the program reference for a complete list of the actions available in Setup Factory.