If a picture's worth a thousand words, how many words is a video worth?
In this lesson, I'll show you how to add a video to your project, cover some of the basic video settings, and teach you how to control a video using a handful of simple actions.
In this lesson, you'll learn how to:
• Add a panel image to frame a video
• Add an attractive text banner to the page
• Add a video object
• Customize the video object's built-in control panel
• Make your own video controls from scratch
• Control the video with a few simple actions
This lesson takes approximately
25 minutes to do.
Starting the Lesson
If you're continuing from Lesson 6, you should still have AutoPlay running with the Tutorial project open. If so, you're ready to move on to the next exercise: Adding a Text Banner.
Otherwise, you'll need to open the project file that you saved at the end of Lesson 6.
When you save a project, AutoPlay automatically creates a project folder for it inside your "My Documents\AutoPlay Media Studio 8\Projects" folder. This project folder is where everything that belongs to the project is stored—including the project file, which contains all of the settings used in the project.
The project folder and the project file always have the same name that you gave to the project when it was created. The project file’s name ends with a ".autoplay" file extension.
Since you named this project "Tutorial" in Lesson 1, the name of the project folder will be Tutorial, and the name of the project file will be Tutorial.autoplay. So, the path to the project file should be something like:
...\My Documents\AutoPlay Media Studio 8\Projects\Tutorial\Tutorial.autoplay
To open the project, you just need to open that project file.
As you saw in the previous lesson, a panel image is just an image object that you put behind another object to achieve some kind of custom background or picture frame effect. Let's use another panel image to provide a "frame" for our video object.
First things first. We're going to add this panel image to the Video page, so click on the "Video" page tab at the top of the work area.
Clicking the Images button at the top of the Gallery pane displays the collection of images the gallery.
Since you used the Gallery pane to add an image from the Panels folder in the previous lesson, the Images section of the Gallery pane should already be displaying the contents of the Panels folder.
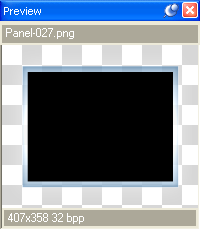
The Panel-027.png file is similar to the Panel-026.png panel image that we used in Lesson 6, but its frame is designed to fit around a standard 320x240 video.

Make sure Align to Page/Dialog mode is on. (An easy way to do this is to right-click on the image, and choose Align. If Align to Page/Dialog mode is on, the To Page/Dialog item will have a box around it.)
Then, right-click on the object and choose Align > Center Vertical.
Finally, right-click on the object and choose Align > Right.
Voila! The image is now positioned perfectly on the right side of the page.
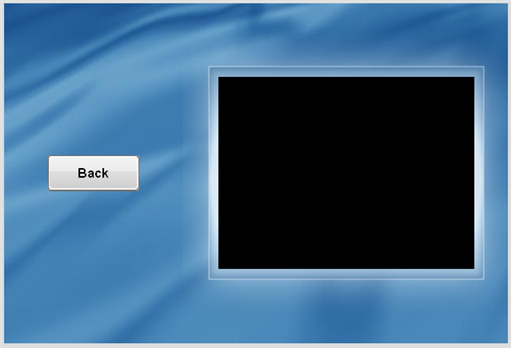
Pinning the image object will make it easier to work "around" the object without moving it by accident.
Tip: You can also pin an object by selecting it and pressing Ctrl+P.
The video we're going to add is a short presentation about a new home design called the "Magnolia." To help introduce the video, let's place an attractive text banner across the top of the page.
In order to make the text stand out, we'll use a paragraph object with white text on a blue background.
Make sure you right-click on the actual page surface, and not on part of the panel image. (If you select the panel image by mistake, try right-clicking further to the left.)
Choosing Paragraph from the right-click menu will add a paragraph object to the page.
When you double-click a paragraph object, all of the text in the Text setting is automatically highlighted for you, so you should be able to just type the text right in.
Note: You want this text to replace the existing default text, so make sure the old text is highlighted before you type the new text in.
We want the paragraph object to have white text, and we don't want the object to appear interactive, so we need to make sure the Highlight and Click colors both match the Normal color.
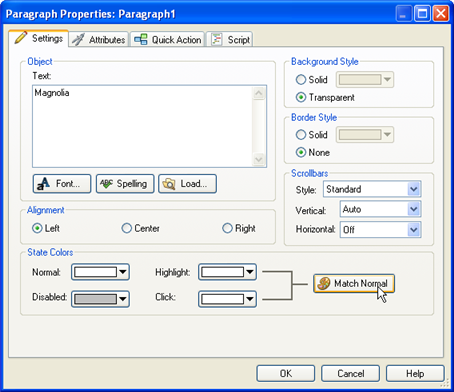
When you click OK, the Paragraph Properties dialog closes and the new paragraph object appears where you right-clicked on the page.
A quick way to change this setting is to double-click it.
Double-clicking the Alignment setting advances it to the next item in its list.
Since paragraph objects start out with their Alignment set to "Left" by default, double-clicking on the Alignment setting switches it to "Center." (If you double-clicked again, it would change from "Center" to "Right.")
This is a quick way to change settings that give you two or three options to choose from.
We want the paragraph object to use an italicized, unbolded, 20-point Georgia font.
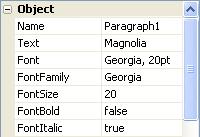
In order to see the object's background color, you need to set its BackgroundStyle setting to "Solid." Setting BorderStyle to "Solid" adds a thin black border around the object.
Note: The border color is already set to black so it doesn't need to be changed.
To set the object's background color, double-click on the BackgroundColor setting, type #5987c0, and press Enter.
We don't want the paragraph object to have a vertical scroll bar. Although we'll be making the paragraph object larger than the text inside it, which should prevent the scroll bar from appearing even if it's set to "Auto," it doesn't hurt to turn the scroll bar off just to be sure.
This will place the paragraph object above the panel image, near the top of the page.
Locking the object will keep it out of your way for the rest of this lesson.
AutoPlay's video object lets you display full-motion video right on the page. You can use it to show all sorts of media files, from training videos and product previews, to home movies and music videos.
Tip: You can also use a File.Open or File.Run action to display a video in an external viewer program. Of course, displaying a video right on the page results in a more seamless user experience.
Note: Video objects will always appear on top of other kinds of objects, no matter how you arrange the objects on the page (i.e. regardless of the z-order). There are technical reasons why this is so, but suffice it to say that it has to do with the way videos are drawn on the screen.
Choosing Object > Video opens the Select File dialog. Clicking the Gallery button allows you to access a small sample video that comes with AutoPlay.
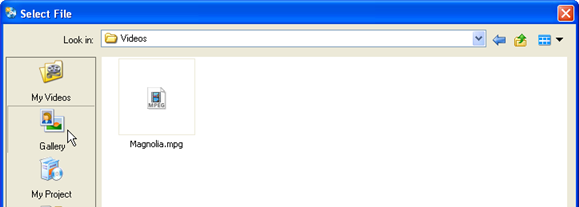
After you click OK, the new video object appears in the upper left corner of the page. A single frame from the video appears in the object, so that as you work on the project you can have a general idea of what it's going to look like when it starts.
(In this case, the frame happens to be black, since the Magnolia.mpg video begins with a fade from black.)
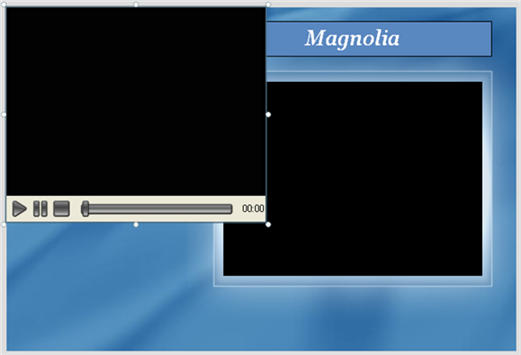
Notice the standard video controls at the bottom of the video object. This is the object’s control panel. On the control panel, there is a play/pause button, a stop button, a position slider, and an elapsed time readout.
Note: The play button toggles between play and pause: it switches to the pause button when the video is playing, and then switches back to the play button when the video is paused.
The ControlStyle setting lets you select from a list of control panel styles. You can use this setting to change the appearance of the built-in video controls, or to hide the control panel completely.
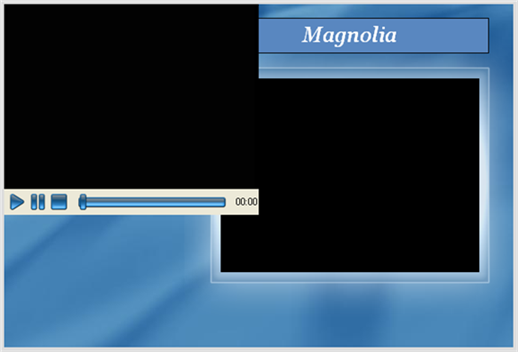
Each style in the list corresponds to a skin file located in the Plugins\Transports subfolder, inside the folder where AutoPlay was installed.
A skin file is just an image with different "control panel parts" arranged in a row. Each individual part of the control panel is represented by a different section of the image. AutoPlay extracts the parts from this image, and then uses them to build the control panel.

The AMS-Blue control panel skin
Tip: You can build your own control panel skins for AutoPlay using a paint program. The easiest way is to use one of the existing images as a template. Simply make a copy of an existing skin file, and then modify the copy, replacing each section of the image with your own corresponding control panel part.
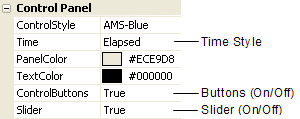
The Control Panel category has six settings inside it: ControlStyle, Time, PanelColor, TextColor, ControlButtons, and Slider. You can use these settings to show or hide the different parts of the control panel and adjust what they look like.
Note: The control panel, and the controls on it, are all completely optional. You can choose to hide the whole control panel, or hide any of the individual parts.
Experiment with these settings to see some of the different control configurations you can come up with.
The AutoStart setting controls whether the video will begin playing automatically whenever the page it's on is shown. We want the video to start playing as soon as the user jumps to the Video page, so make sure this is set to "True."
The Loop setting controls whether the video will automatically restart from the beginning when it reaches the end. In this case, we just want the video to stop when it reaches the end, so leave it set to "False."
The Border setting controls whether the video object will have a black border around it. You can turn it on if you want, but I think this video looks fine without a border.
In short: make sure all these settings are set to their default values. (Okay, I'll admit it...this step was just an excuse to point out what those settings do.)
Video Scaling Mode controls whether the video will maintain its original aspect ratio, or will "stretch" to fill the size and shape of the bounding box. Stretching the video usually makes it look much worse, but it can be helpful if you really don't want any black bars around the video, and don't want to resize the object to make the black bars go away. (It's usually better to keep Scaling Mode set to "Maintain Aspect," and just adjust the size of the video object instead to eliminate any black bars.)
Tip: Preserving the original aspect ratio is important for image files and videos, which often look distorted if they're stretched disproportionately. An easy way to preserve an object's aspect ratio is to right-click on the object and choose Keep Aspect. (If you need to, you can restore the object's original aspect ratio by right-clicking on it and choosing Restore Size.)
The left, right, and bottom sides of the video object will probably need to overlap the frame of the panel image by just a smidgeon. But that's okay.
Tip: A trick for setting the object's position precisely is to drag it more or less into place with the mouse, and then move it in tiny increments with the cursor keys. By moving the object back and forth across the inside edge of the frame, one pixel at a time, you can see the exact position where the top of the object matches the top of the black background on the panel image.
If you'd rather just set the object’s position directly, set Left to 268, and Top to 93.
Once it's in place, pressing Ctrl+P will pin it so that it can't be moved or resized any more.
Note: You don't have to pin the object, but this is something I like to do when I have an object where I want it. I find it easier to work around objects if I don't have to worry about moving them by accident.
Choosing Page > Preview temporarily builds and displays the current page, so you can see how it will look and work when it is seen as part of the application.
Tip: You can also preview a page by right-clicking on its page tab and choosing Preview.
Note that the video starts playing automatically as soon as the page is shown. This is because the video object's AutoStart setting is set to "True." (The same thing will happen each time the users navigate to this page in the full application.)
Previewing the page is often faster than previewing the whole project, because AutoPlay doesn't have to build the whole project—it only has to build one page. More importantly, you don't have to navigate all the way from the start page just to get to the page that you want to test. (Which also means you can try out a page before you've added any Page.Jump actions to get to it from the start page.)
Pressing Alt+F4 when the preview application is selected (i.e. when it's the "foreground application" in Windows) immediately closes the application.
You can use this method of exiting from the preview when your application doesn't have a title bar.
Of course, since your application does have a title bar, you can also exit from the page preview by clicking the Close button.
In addition to the built-in video controls on the video object's control panel, you can use AutoPlay's video actions to provide your own "homemade" video controls.
Changing the ControlStyle setting from "Basic Blue" to "None" removes the control panel from the object completely.

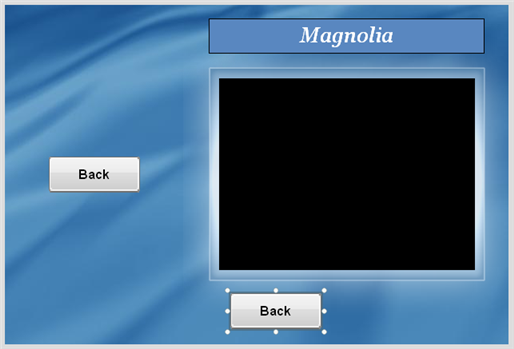
Now, we could just add a new button object, and set it up to be like the other buttons in the project, but using the Back button as a template is much easier. This way, we don't have to set the object's Normal, Click and Highlight colors—they're already set for us.
Note that the new object's name is Button1, since 1 is the first number that isn't used in a button object's name on this page.
Wait a minute...isn't this the second button that you've added to this page? Indeed it is! But since the name "Button1" hasn't been taken yet, it gets used first. Remember how the "Back" button carried its name over when you copied and pasted it in lesson 4? Since that button's name is Button3, this leaves the first two default names "open" for new button objects to use on this page.
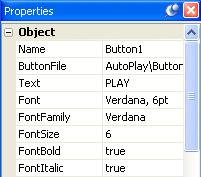
This is going to be our play button. Setting the font to 6-point Verdana makes the text small enough to fit on a very small button, without being too hard to read. (Making the text use only capital letters helps get the most visibility out of such a small font.)
The YOffset setting allows you to fine-tune the vertical position of the text on the button object. It specifies the number of pixels that the text should be offset vertically from its default position.
Sometimes, changing an object's size or font settings will cause the text to be rendered off-center. In this case, the text was being drawn a little bit too high with the default offset of 0. Setting the Y offset to 1 moves the text down by one pixel, so that everything is in its right place on the object again.
This will give you an exact copy of the play button.
Tip: You can replace the button image that is shown in a button object by dragging a new image onto it with the Shift key held down.
Once again, you want to duplicate the object and end up with a similar STOP button.
You should now have a total of three little button objects: one with the word PLAY on it, another with the word PAUSE on it, and a third with the word STOP.

Note that the name of the third button—the one with the word STOP on it—is not Button3, but Button4. This is because the name "Button3" was already taken by the Back button. So, AutoPlay skipped ahead to the next available default name for a button object on this page, which in this case was "Button4."
Make sure Align to Page/Dialog mode is turned off. (An easy way to check this is to right-click on an object, and choose Align. If Align to Page/Dialog mode is on, the To Page/Dialog item will have a box around it.)
If Align to Page/Dialog mode is on, choose Align > To Page/Dialog to turn it off.
The goal is the get the three objects lined up horizontally and distributed evenly, with PLAY on the left and STOP on the right, like this:

Select all three button objects, and press Ctrl+G to group them. Then center the group horizontally beneath the video object.
You should end up with the PLAY, PAUSE and STOP buttons in a row below the video object, like this:
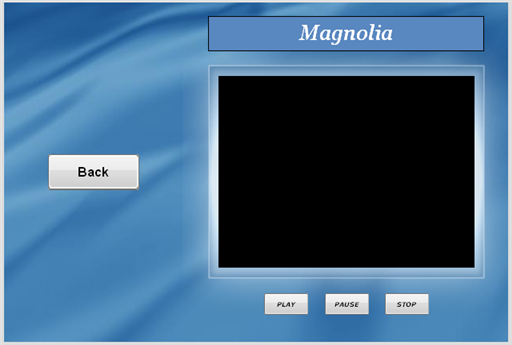
Tip: You aren't limited to buttons with text on them, either. If you'd rather have buttons with iconic symbols for things like play, pause and stop, you can easily create your own buttons using the AutoPlay Media Studio Button Maker, which you can access by choosing Tools > Button Maker.
Now that you have the buttons where you want them, ungroup the objects by selecting one of them and pressing Ctrl+Shift+G, and then pin them by pressing Ctrl+P.
Ungrouping the objects will make it easier to select them independently in the next exercise. Pinning the objects will prevent them from being repositioned by accident.
Now that we have our PLAY, PAUSE and STOP buttons laid out on the page, let's make them actually play, pause and stop the video.
To do that, we just need to add an action to each button.
Clicking on the page surface deselects the objects, so that none of the objects on the page are selected. (Make sure you click somewhere on the page surface where there isn't an object. If you select an object by accident, just click again somewhere else.)
Double-clicking on an object opens up the Properties dialog for that object. Clicking on the Script tab switches to the script editor so you can edit the object's actions.
Note that this button object already has a Page.Jump action assigned to its On Click event. (The action was copied over from the Back button when you duplicated that object.) We're going to replace this Page.Jump action with a Video.Play action.
Replacing the action is easy enough—just remove the old action, and add another one in its place. To remove the old action, simply highlight all of its text on the script editor, and press the delete key.
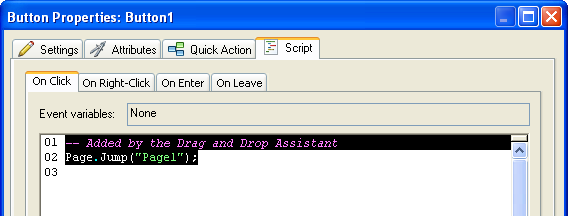
Note: As you've probably noticed, actions are just text instructions that get interpreted by AutoPlay. You can edit these instructions directly, just as you would edit text in a Word document.
Once you've gotten rid of the old action, you can click the Add Action button to add a new Video.Play action in its place. (When the New Action wizard appears, select the Video category, then select the Video.Play action, and then click Next to advance to the wizard's second page where you can customize the action.)
The Video.Play action takes a single parameter, called ObjectName, which tells the action which video object to play. Since there is only one video object on the page, the ObjectName parameter should already be set to "Video1" for you.
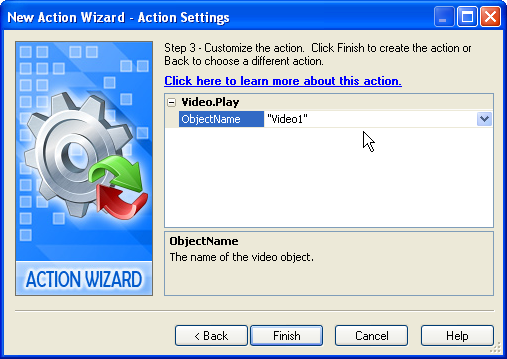
Once you have the action configured, click Finish to add it to the script. Then click OK to close the script editor and accept these changes that you've made to the object's On Click event.
Tip: Since actions are just text, you could also add this action by typing Video.Play("Video1"); directly into the script editor.
AutoPlay actually remembers the tab that you were on the last time you double-clicked on an object, but it does so on a per-object basis. When you double-click on an object for the first time (like this PAUSE button), it always defaults to showing you the Settings tab.
Once you've visited another tab on the Properties dialog for any particular object, though, the next time you double-click on that object you'll be taken right to that tab.
Of course, that doesn't help us when we're double-clicking on a "fresh" object like the PAUSE button. Since this particular object hasn't been double-clicked before, you still need to click on the Script tab to switch to the PAUSE button's script editor.
This object also has a Page.Jump action on its On Click event. Once again, simply delete the existing action's text, and then click the Add Action button to insert a Video.Pause action in its place.
Since actions are just text, you can also add an action by typing it directly into the script editor.
Note: This is what most people generally think of as "programming," but it really isn't that difficult. In fact, as you're about to see, AutoPlay makes programming a lot easier than you might think.
As you type the first few letters of the word "Video" into the script editor, a black tooltip will appear nearby with the word "Video" on it. This is the script editor's autocomplete feature at work. Whenever you type something that the script editor recognizes as a keyword, it will display its best guess at what you are typing in one of those little black tooltips.
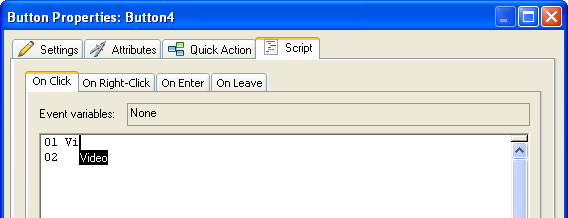
Whenever one of those little black tooltips is visible, you can press the Tab key to automatically type the rest of the word. For example, you can type Vi into the script editor, press Tab, and the script editor will fill in the rest of the word "Video" for you.
There's more editor magic, too. When you type the period after the word Video, the script editor recognizes what you've typed as the beginning of an action name, and presents you with a drop-down list of all the actions that begin with "Video." If you like, you can choose one of the actions from that list—in this case, scrolling down to the bottom and choosing the word "Stop"—and then press either Tab or Enter to automatically type that word out for you.
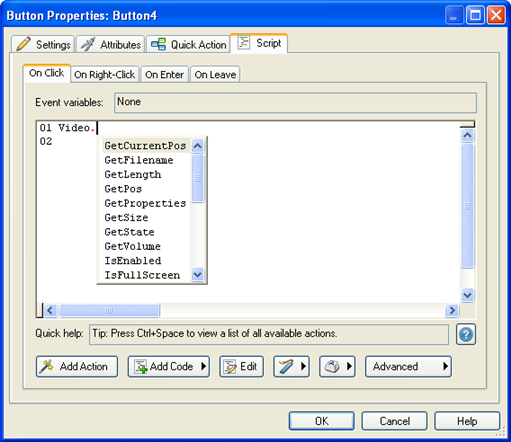
You don't have to use the drop-down list, though...you can continue typing the rest of the action yourself if you want. (For short action names like Video.Stop, it's probably faster to do it that way.)
Tip: The period in an action name is either pronounced "dot," as in "Video-dot-Stop," or it isn't pronounced at all, as in "Video Stop."
Once you've typed something that the script editor recognizes as the name of an action, a little bit of Quick Help appears near the bottom of the window.

This is essentially a "blueprint" for the action, listing the names of the action's parameters and indicating what type of value is expected for each one. In the case of our Video.Stop action, the Quick Help looks like this:
Video.Stop(string ObjectName)
...which indicates that the action takes a single parameter called ObjectName, and that this parameter needs to be a string.
Strings need to be quoted, and the name of the video object that we want to stop is Video1, so the full action needs to be typed exactly like this:
Video.Stop("Video1");
Note: The semi-colon at the end of the line tells AutoPlay where the end of the statement is. It acts as a terminator. (No relation to Arnold, though.) Although technically it's optional—AutoPlay can usually figure out where the end of the statement is on its own—it's a good idea to get in the habit of including it, to avoid any potential confusion.
Once you've typed that text onto the script editor, you can click OK to confirm the changes that you've made to the object's On Click event.
And that's it! You've just added an action, programmer-style.
Always save the project! As much fun as it was to add these video controls, there's no point having to do it all over again if something unexpected happens. (Is that the rumble of thunder I hear off in the distance...?)
That's it for this lesson.
Lesson 7 Summary
In this lesson, you learned how to:
• Add a panel image to frame a video
• Add an attractive text banner to the page
• Add a video object
• Customize the video object's built-in control panel
• Make your own video controls from scratch
• Control the video with a few simple actions